

Every "Sold Out" page on your Shopify store is leaking revenue, and most merchants never measure how much. But they don't wait. They don't bookmark it. They find a competitor who has it in stock, and that's a major problem.
Since your ad spend brought them there, but your out-of-stock page sent them somewhere else. The fix isn't complicated. A back-in-stock email alert captures their interest and automatically brings them back when you restock.
This guide shows you exactly how to set up back-in-stock email alerts on your store with step-by-step instructions, no code required, in a short time.
What is a Back-in-Stock Email and How Does It Save the Sale?
A back-in-stock email is an automated notification sent to a shopper who requested a back-in-stock alert for a sold-out product. The moment that item returns to inventory, the email will be automatically fired and land in the inbox of someone who has already decided they want to buy. That's what separates it from every other generic email in your store. Because it represents the interest that was interrupted by a stockout.
So what does a back-in-stock email have? Here are the components in it:
- The Exact Product: Pulls the precise item image, title, and selected variant (size/color) to instantly reactivate their buying intent.
- Clear Availability Signal: Uses real-time inventory context (e.g., "only 47 units left") rather than a generic headline to make the urgency to buy more apparent.
- One Direct CTA: Links directly to a product page so shoppers can check out instantly without having to re-select options.

Image Source: XFlow Demo
Turn Restock Emails Into Conversion-Ready Experiences with XFlow
Use mobile-friendly layouts, urgency-driven messaging, and VIP targeting to turn restock alerts into faster conversions.
Build for FREEBut how does it actually save your sales? When the email arrives within minutes of the restock, the customer's original buying intent remains intact. For that, they're being given a second chance at something they already wanted. That's why back-in-stock emails average 60% - 70% open rates and outperform every other automated email type in terms of conversion.
Yet, managing this with a general email tool is nearly impossible because standard platforms can't really help with back in stock alert that focus more on product control. This can make your back-in-stock alert less optimized. That is why merchants need a tool built specifically for this job: XFlow.

How to Set Up Back-in-Stock Email Alerts (Step-by-Step Guide)
As you know, most merchants start with one of three approaches: building a workflow in Shopify Flow, bolting together a general email platform like Klaviyo or Mailchimp, or installing a dedicated Shopify back-in-stock app like Amp, Kbite, or... Those tools can still be great solutions.
But if you want more control over your product line and high SKUs, XFlow is a great option. Moreover, it’s a Shopify back-in-stock app that helps you create not only a systematic workflow but also a high-converting Shopify back-in-stock notification, and automatically sends it to customers. So let’s discuss how to set up a back-in-stock email alert with XFlow, step by step.
Here's how to get it running in your store with six simple steps.
Step 1 - Install XFlow from the Shopify App Store
To begin with, you will need to install XFlow on your Shopify admin dashboard by:
- Search for XFlow: Go to the Shopify App Store and look up XFlow Back in Stock Alert.
- Click "Install": Hit the install button to automatically redirect to your Shopify admin.
- Open the App: Once installed, you can find and manage XFlow anytime under the Apps section of your Shopify dashboard.
So what does XFlow actually look like under the hood? Inside the dashboard, you’ll find seven core features built to automate your sales recovery, which are:
- Campaigns: It’s the control layer that decides who gets notified, when, and with which workflow when a product is back in stock.
- Email templates: Design and customize the layout, text copy, and product variant images for your back-in-stock notifications to match your brand's exact style.
- Workflows: Build and adjust the automated trigger rules that determine exactly when and how your alerts are automatically fired to subscribers.
- Subscriptions: Track active waitlists in real time to see exactly which actions occurred within the timeline when your customers were active.
- Orders: Track your recovered revenue directly by monitoring which completed sales and checkouts were driven by your restock notifications.
- Customers: View and manage individual contact profiles, subscriber histories, and product waitlist for everyone who opts into an alert.

Image Source: XFlow Back in Stock Alert
Step 2 - Create your Back in Stock emails
Before setting up the automated workflow, you need to create back-in-stock emails that your customers will actually receive. Inside XFlow, navigate to the Email Templates section, and you can either start from a pre-built template or design one from scratch using the email templates builder by clicking the “Create Email” button.

Image Source: XFlow Back in Stock Alert
First, fill out the email template name you will use for your campaign.

Image Source: XFlow Back in Stock Alert
Secondly, begin creating your desired email template using the Email Template Builder. By adding content, sections, or visual images, your email is ready to be used.

Image Source: XFlow Back in Stock Alert
After that, click Save & Activate to start using your email for your upcoming campaign.

Image Source: XFlow Back in Stock Alert
Congrats, your email is now active. Start integrating it into your workflow (as explained in the next step) and be ready to use it.

Image Source: XFlow Back in Stock Alert
As a user myself, I highly recommend that you focus on showing the product that has restocked in your back-in-stock emails, including aesthetic, highly detailed images and a clear call-to-action button that links directly to the product page. Besides that, you can improve your emails by including social proof, such as “Over 200 customers requested this restock.” It's optional, but it can be very effective. Not only that, XFlow lets you pull in dynamic elements to personalize customer emails.
Customize Every Email Layout on Mobile with Ease
Back-in-stock emails on mobile are now driving more clicks with XFlow: Customize any text box, CTA, or brand color in each message.
Start with XFlowStep 3 - Build Your Automation Workflow
This is the step where XFlow's workflow builder comes in. First, navigate to Workflows and create a new back-in-stock alert workflow by clicking “Create Workflow”. Not only that, there are workflow templates for you to choose from.

Image Source: XFlow Back in Stock Alert
To begin, enter your workflow name to create the workflow.

Image Source: XFlow Back in Stock Alert
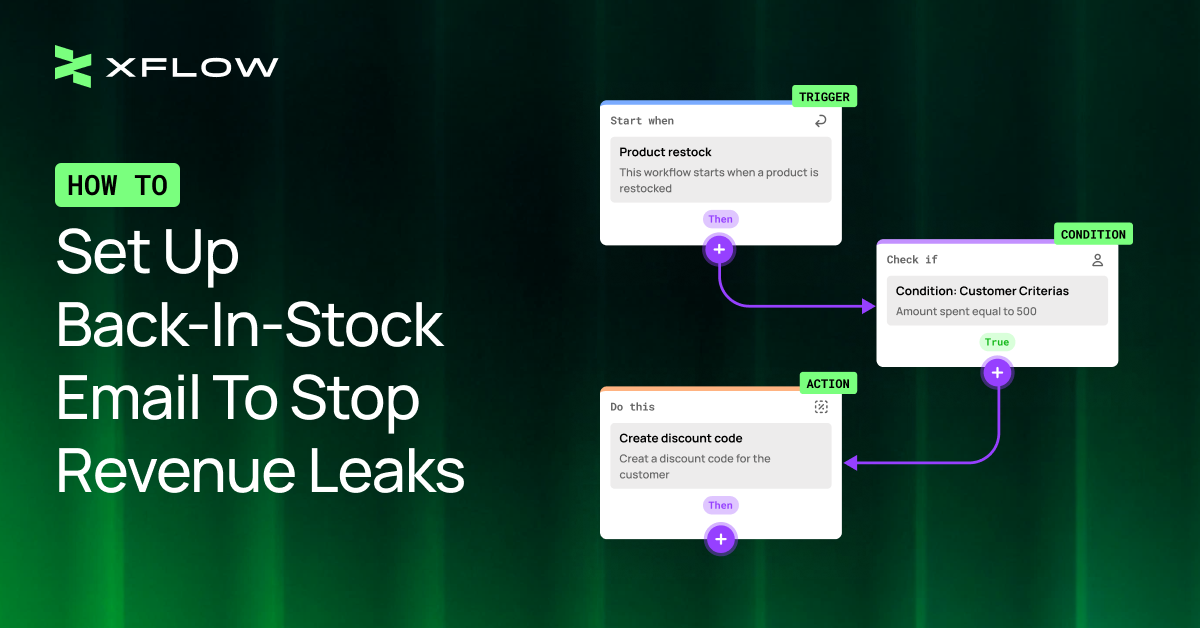
Trigger: A trigger defines when a workflow starts in response to a specific event. When the trigger occurs, the workflow is automatically executed, and relevant data is passed to subsequent workflow steps.
There are 2 types of triggers:
- Product Restock: which is when a product variant goes from out of stock to back in stock.
- Customer Sign Up: which is when the customer submits the “Notify Me” form.
Condition: A condition checks whether certain criteria are met before the workflow continues. From that, the workflow can follow different paths or decide whether to run specific actions.
There are several types of conditions:
- Event occurred: This condition checks whether a specific event occurred. For instance, events related to email opens, email clicks, customer unsubscribes, and customer purchases.
- Customer Criteria: Checks whether customer data meets the criteria. It has 8 customer fields with flexible operators for users to customize.
Action: It’s where activities begin after the trigger and previous conditions are met. And there are many types of actions you can choose from, depending on your purpose, such as sending an email, creating a discount code, sending a push notification, or sending an internal notification.
After understanding these elements, you can now begin to set up the workflow by following these instructions:
- Add a Step: Click the plus (+) icon anywhere in your sequence to drop in a new condition or action block.
- Modify or Remove: Simply hover your mouse over any existing block to quickly edit its settings or delete it from the workflow entirely.
- Add Notes: Click on a block and select Edit description to leave a custom note or label explaining what that specific step actually does.
- Route Your Customers (Yes/No Logic): When you set up a conditional rule, the builder splits into two paths: a True branch (if they match the rule) and a False branch (if they don't). Simply continue building your steps down the path that fits your strategy.

Image Source: XFlow Back in Stock Alert
Later, after all of the previous steps are done, you can edit & intergrate the email templates that are suitable for the action block within your workflow, in this case, back in stock alert. Following, click “Turn on workflow” to make it active and ready to go.

Image Source: XFlow Back in Stock Alert
Finally, go to the Workflow dashboard and check if it is “Active” or not. If it's active, then congrats, your workflow is all set.

Image Source: XFlow Back in Stock Alert
Here are some case scenarios about typical workflows:
- Restock Notification: This workflow triggers when a product is restocked, instantly sending a back-in-stock alert (configured in Email Templates) to capture buying intent. The system then tracks whether the customer completes a purchase, and automatically sends them a follow-up notification about the purchase confirmation.

Image Source: XFlow Back in Stock Alert
- Back in stock with an exclusive discount for loyal customers: This workflow triggers when an item is restocked and immediately checks subscriber data to see if they are a repeat buyer with multiple past orders. If they meet these loyalty criteria, XFlow automatically generates a unique VIP discount code and fires a notification about their exclusive discount.

Image Source: XFlow Back in Stock Alert
Send the moment inventory updates automatically
XFlow triggers your back-in-stock email within minutes of restock, so you never lose a sale to slow timing.
Get Started with XFlowStep 4 - Create and Launch Your Campaign
This is where you decide how your Shopify back-in-stock app optimizes your product benefits for your business. With your template and workflow ready, go to Campaigns and click “Create campaign” to begin. Furthermore, there are 2 campaign types to choose from: the Advanced campaign (for specific products or collections) and the Global campaign (for all products).
- Global Campaign: It allows users to quickly enable a global restock campaign using workflows and email templates. This campaign applies to all out-of-stock products in the store and automates the sending of back-in-stock notifications.
- Advanced Campaign: It provides users with greater flexibility and control over back-in-stock notifications. It allows changing the scope and target for the specific product, and setting priorities when necessary.

Image Source: XFlow Back in Stock Alert
Next, give your campaign a relevant name. And then, define what product (or collection) this campaign is focused on. Moreover, assign the workflow you created earlier. After that, click “Save” and re-check. Once everything looks right, activate the campaign.

Image Source: XFlow Back in Stock Alert
If your campaign looks like this, you’ve successfully created one with workflow integrated.

Image Source: XFlow Back in Stock Alert
From my experience, you should start with a Global Campaign for your entire product line. After 30 days, check which product categories convert best, then create Advanced Campaigns with optimized messaging for top performers.
Here are some scenarios for you to examine:
- Household Item Restock Campaign: This campaign is set to protect sales for a specific product SKU, in this case, which is "The Everyday Garden Hose - Black", which frequently flashes a "Sold Out" badge due to high demand for previous in-stock. By locking onto a specific product rather than the whole store, the setup serves the demand from new customers

Image Source: XFlow Back in Stock Alert
- Best Collection Demand Evaluation: It’s set to test the entire collection across an entire line of seasonal products. This campaign can be used to evaluate the potential and effectiveness of each product in this collection, informing future releases of similar product lines.

Image Source: XFlow Back in Stock Alert
Create Restock Emails That Actually Work
From urgency to personality, XFlow gives you everything you need to send back-in-stock emails customers actually want to open and act on.
Explore XFlow nowStep 5 - Add the "Notify Me" Button to Your Product Pages
To make customers sign up, they need a way to do so when they land on an out-of-stock page. For that reason, XFlow provides a "Notify Me" widget that you can add to your product pages. First, click the “Notify me” widget settings to begin editing the CTA button.

Image Source: XFlow Back in Stock Alert
Move on to this. You can also customize many elements (like text, color, ...) in the “Notify me” widget settings on the XFlow Dashboard to make it more aesthetic and relevant to your objective.

Image Source: XFlow Back in Stock Alert
(Remember: You must turn on XFlow Helper in your App Embeds, and you also need to add the XFlow app block within your theme editor to allow the function to work.)
After all that, the button will automatically appear on any out-of-stock product.

Image Source: XFlow Back in Stock Alert
Step 6 - Performance Monitoring
Once your first restock alert campaign is ready to go, head to the Campaigns dashboard to review performance metrics (like orders, revenue, and attribution).

Image Source: XFlow Back in Stock Alert
To be more efficient, you can also use the Subscription to view your customers' restock orders and track recent subscriber activity. Therefore, you can use this data to refine your email template and workflow over time.

Image Source: XFlow Back in Stock Alert
Here are some tips: if the signup rate for a product is high but the conversion rate is low, it may be that inventory sells out again before customers open their emails (a timing issue). Or if that product gets 5x more signups, you should order more inventory next time. If conversion drops over time, you can test new subject lines and email creatives.
You've seen how it works - now build yours
Design, automate, and track your back-in-stock campaigns in one place with XFlow.
Try XFlow NowFAQ
Q: Why isn’t the "Notify Me" button showing up on my product page?
This is almost always caused by one of four technical reasons:
- The XFlow Helper is not turned on in your Shopify Theme Editor's App Embeds tab.
- The product or specific variant is not actually out of stock.
- The product has not been included in an active campaign.
-
Your theme uses a highly customized product form that blocks XFlow's auto-replacement engine.
Q: What is the exact difference between a Campaign and a Workflow?
Think of it as control versus action:
- Campaign = Scope & Control: It defines which products are included and when notifications are allowed to run.
- Workflow = Logic & Actions: It defines the exact visual steps that happen after a restock, such as sending your designed email or adding delays.
Q: Does the back-in-stock alert work for specific product variants?
Yes. Shoppers can choose to subscribe to all variants of a product or target a specific variant. If they subscribe to a specific variant (like size Medium or Navy blue), XFlow is smart enough to notify them only when that exact variant is back in stock.
Q: Why is my restock email template not sending?
If your automation is stuck, run through this quick baseline checklist:
- Verify that the email template itself has been set to Activated.
- Ensure your workflow status is set to Published and is not sitting in draft mode.
- Confirm that the product inventory is actually in stock.
And this is the end of our post. Are you ready to stop losing sales to your out-of-stock page? Install XFlow for free from the Shopify App Store and have your first back-in-stock email alert up and running with no technical skills required.
